Sunday, April 29, 2012

Lofts!


We got both of the lofts up today and put most of the metal straps that will help tie the walls to the subfloor.  We also, put the wall caps on and tried to square up the walls as much as we could.  They will move when we put the sheathing on but it always helps to not be too far off with that kind of thing... 


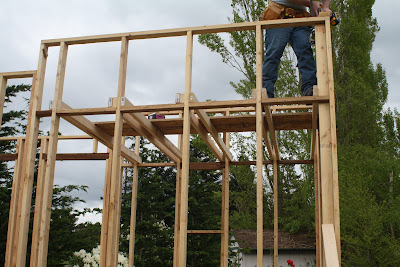
This is the sleeping loft framing.  We will be re-inforcing this with some beams that are parallel to the wall to give it more rigidity in the middle but for now it looks great!


Its actually starting to take form!


Just sittin on a wall...


This is the second loft that will be above our breakfast nook.  It is only about 17 inches wide.


Another shot of the sleeping loft.


From underneath, a shot at the cross braces we have to help the loft a bit.   


Screwing in the top place above the door.


Soon to be our door...


Our friend Sandy after we wrapped the trailer all up with two tarps.  It looks like a giant christmas present to me... I christmas present full of blood, sweat, and tears.. My Favorite!


We put in a good day but had to call it quits because Margo wasn't feeling too hot.  She had a really bad headache so we left a little earlier than planned but I am very happy with what we accomplished this weekend.  Next is sheathing in the walls and starting on the roof!

-Jeff

Saturday, April 28, 2012

Walls!

Today was a great day!  We woke up, had some coffee and took off to the build site.  We were able to get all four walls put up and put into place. Below are some pictures that show what we completed.  


 This is the second wall after we laid all of our boards out.  We attached them using both, wood glue, and 2 1/2" screws.  


The second wall up and braced.  It is hard to see but this wall has no windows except for our door (which has a full length double pane window) 


Another angle...


Plan of the rear wall


Margo setting in the header for the breakfast nook window.  


The rear wall 


Last wall up! (front).  This has two windows, one long skinny window about where my right hand is and a window that will be in our sleeping loft above my head.


After we squared up the walls and screwed them to the subfloor.


Finally, we have four walls and a floor...


Tomorrow we hope to build the loft so we can start on the roof!


-Jeff

Friday, April 27, 2012

Anthropological perspective on Tiny Housers

Check out this interesting documentary if you're curious what kinds of people are building their own tiny homes and living in them. It was posted to the Tiny House Blog yesterday. It is made by the couple behind the We Are the Tiny House People website.

It's a bit long, so when you have a free hour to sit down with a cup of tea, watch this video:


Enjoy!

-M.

Tuesday, April 24, 2012

We have a floor! And a wall....

A day in pictures because I'm not feeling creative enough to write too much. This is all the work we got done on this past sunny saturday.

A friends' borrowed truck loaded up with lumber and a shower stall we bought on craig's list. (Thank you!)

Pieces of insulation being placed into the subfloor.

Insulation in the pile waiting to be cut.

We tightened all bolts and added Threadlocker red so they'll never be able to unscrew.

Erica adding the strongest superglue ever! Thanks E.!

Not sure what I'm doing here...showing how strong the foundation is maybe?

Jeff and Sandy cutting all of the insulation to fit into the subflooring. Thanks Sandy!

Kati and are....not working, apparently... Just kidding, Kati hauled a bunch of insulation and helped install it. Thank you!

Erica is showing off our excellent work applying spray foam to any gaps between insulation and framing.

Sandy fitting the puzzle together.

Drilling down the top layer of OSB. 1/2 inch here.

Dave is supervising. Thanks Dave!

Beginning the framing of wall #1

Wall coming together...


This is the wall we were building on Saturday.

This wall will be built next.

End of the day on Saturday--almost finished!

This is a picture Jeff sent me at the end of the day yesterday, after he finished the first wall all by himself! 

Thanks to all of our wonderful friends including Arrie (not pictured) for your generous help over the weekend! We appreciate it so much!

-M.

Sunday, April 15, 2012

The Birthday luck was with us....

We had GORGEOUS weather, almost 70 degrees this weekend at times and mostly sunny. We took a break from construction on Saturday to celebrate my birthday with some friends and family down at the waterfront, before we got back at it on Sunday.

Picnic with friends....

Birthday with J-hubster

When we got back to work on Sunday, we finished sheathing the bottom of the subfloor with the last tow pieces of OSB pretty quickly, and then we began cutting and applying the Metal Flashing that will go along the whole bottom of the house to act as a barrier to rodents, road debris, weather, etc. 

Jeff screwing in the edge of a piece of flashing

This was a somewhat slow process, because if you didn't have one person holding the metal down while the other person was screwing the pieces in, the whole roll would flip back over and roll up to the other side of the subfloor. 

We were using two rolls of 50' x 20" Galvanized Steel Flashing purchased from Home Depot. Not salvaged, unfortunately.

Me acting as the weight while Jeff secures the flashing.

Me screwing in the flashing, each piece overlapped to ensure good protection. 

So...many...screws....The sun reflecting off of the steel felt like it was baking us.

Finally, the finished Metal barrier! Hooray!

Then came the tricky part. This thing weighed an incredible amount at this point. After the wood 2x4 framing, plus the sheathing of 3/4" OSB, plus the metal (which weighed 120 lbs. alone), this thing was a beast at this point. We asked our wonderful host Jeff W. and he kindly assisted us with hoisting the subfloor framing onto the trailer.

It was incredibly heavy and very hard to move, but somehow we did it!

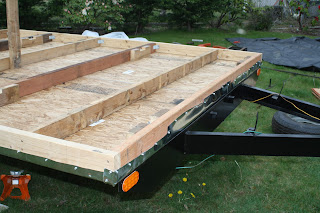
Here it sits atop the Trailer.

Then came the meticulous search for the holes which we had drilled into the trailer. We had drilled holes in the trailer for the bolts to go through, as well as holes through the 2x4's and OSB, but we had to make sure these all lined up just perfectly in order to get the bolts through.

Let's just say that 20 minutes, a giant mallet, and three adults heaving and pulling around the subfloor later, we finally had the first bolt in. This is the top of the bolt with washer and nut.

This is the bottom of the bolt attached to the trailer (and don't worry, that's before it was tightened).

The front of the subfloor attached to the trailer. It took us longer than we expected to get all the bolts into place, and attach and tighten the nuts.


The underside of the trailer with the flashing.


Our covering, to protect from rain over the next few days.

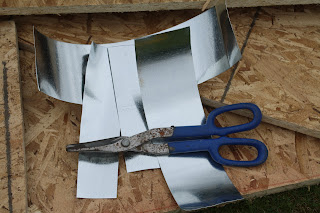
Look how little scrap metal we had leftover from our two 50-foot rolls! We had to cut pretty judiciously to have so little left over. 

We didn't completely finish the subfloor with the insulation and top sheathing as we had hoped to today, but we still had an extremely productive day that we were both pleased with. Oh, and we bought the window for our loft tonight, which is the last one we needed. We weren't able to find it salvaged, so we had to give in and buy a new one, but we did search high and low for a salvaged one with no luck. 

All in all a great Day! 

-M.